Lily2D — Getting Started
What is Lily2D
Lily2D is a code-first 2D game engine framework. It handles the repetitive engine work so you can focus on the game-specific parts.
You write your game in Swamp. If you have used Love2D, PICO-8, or another programming language before, the main thing to learn is Swamp’s syntax and Lily2D’s runtime model. In return you get type safety, deterministic execution, fast compilation, and hot reloading.
If you want a broader comparison with other engines and workflows, check the FAQ.
Lily2D License
The license is permissive. You can export your games and sell the exported build without paying royalties. You may not redistribute or resell the Lily2D application itself or its bundled tools.
Contents
When you install Lily2D through Steam, you get Lily Hub, a GUI for creating projects, building them, running them, and managing templates. You also get a VSCodium extension for syntax highlighting plus live errors and warnings, and a lily CLI that exposes most of the same workflows from a terminal.
Installing and running Lily2D
Steam installs the versioned tools you need locally. Start Lily Hub once so it can verify and configure your environment.
Linux is not officially supported, but there is more information in the FAQ.
Setting up your first project
For your first project, create a new project and choose the cursor template, then press Create Project.
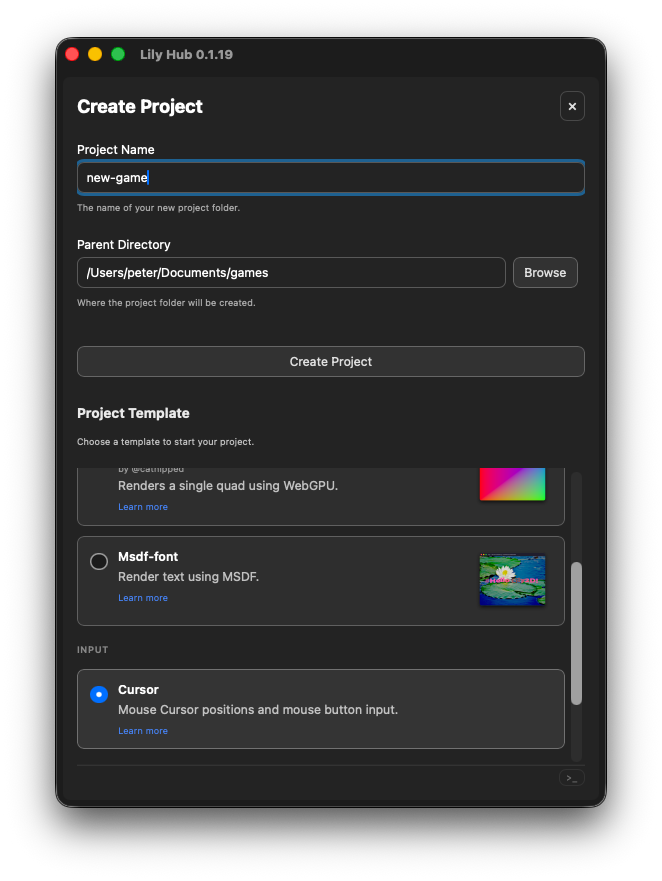
To create the mouse cursor project using the lily CLI:
lily new --template cursor your_game_name
Project structure
Project configuration, the compiled .lily executable, and other runtime files live in the lily/ directory.
Put your Swamp source files in src/ and any subdirectories you need.
Put files you want to load from Swamp, such as .wav or .png files, somewhere under assets/.
Swamp supports reusable packages. For now, think of .sprout-vendor/ as downloaded packages and packages/ as optional local packages you are developing yourself.
One of the first things Lily2D does is read lily.yini from the project root. This file holds runtime settings such as the initial window size.
main.sw, simulation.sw and render.sw
We recommend installing the Swamp extension for VSCodium, but you can use any text editor you prefer.
Lily2D separates input, simulation, and rendering. The simulation tries to run on a 16 ms tick rate, or 62.5 updates per second, while rendering runs whenever the GPU can present a frame, usually around 60 FPS or better.
Lily2D wires these scripts together for you and passes your simulation state into the renderer so it knows what to draw. Rendering must not mutate (alter/write) simulation state; it only presents the current state.
To keep execution fast and avoid runtime memory allocation, Swamp uses fixed-capacity containers. You choose the maximum size up front, and the memory is reserved at compile time.
Lily2D also uses the concept of an anchor. An anchor is a named value that the engine can look up to find your input, simulation and rendering data.
anchor render = ExampleRender::new()
anchor simulation = ExampleSimulation::new()
anchor input = InputLogic {..}
anchor input_return = SimulationInput {..}
inputis called through itstick()function and returns the type used ininput_returnsimulationis called through itstick()function, and theinput_returnvalue is passed into it automaticallyrenderis the struct that providesrender()andresize()
Input:
impl InputLogic {
    // Tell Swamp that Lily2D will call this function
    #[host_call]
    fn tick(mut self) -> SimulationInput {
        ...
    }
}
Simulation:
impl ExampleSimulation {
    #[host_call]
    fn tick(mut self, input: SimulationInput) {
        ...
    }
}
Render:
impl ExampleRender {
    #[host_call]
    fn render(mut self, sim: ExampleSimulation) {
        ...
    }
}
Writing your first code
Let’s start with input. This example uses the mouse:
First you define which actions are available in a text configuration file. Lily2D uses the .yini format for configuration.
action_sets: {
    SpaceCraft: {
        # :cursor means we want absolute positions
        cursor_pos: :cursor
        fire: :button
    }
}
The lily/actions.yini file defines the action set name, which must match the Swamp struct that receives the input values. In this example, the name is SpaceCraft.
struct SpaceCraft {
    cursor_pos: (Int, Int)
    fire: Bool,
}
In lily/actions.yini you describe the semantic meaning of the input, and in Swamp you define the fields that receive those values.
There is one more step: bind the physical input device to the abstract action. In this case we use lily/keyboard_mouse.input.yini:
bindings: {
    SpaceCraft: {
        cursor_pos: :mouse_cursor
        fire: :mouse_button(left)
    }
}
This tells Lily2D which input should populate each field.
Now the setup is complete. Continue with the code:
In InputLogic::tick, call get_active_devices() to get the connected device handles. The keyboard-and-mouse device is always present.
Use set_active_action_set() to select the action set you want to read. Since this example only uses one set, we do it every tick().
input::set_active_action_set::<SpaceCraft>(device_id)
And finally we use get() to get the SpaceCraft fields filled in:
space_craft_input: SpaceCraft = input::get(device_id)
Now the values are available like normal fields:
if space_craft_input.fire {
  // Do something here
}
The curosr example checks whether fire was pressed, then returns a SimulationInput that will be fed into ExampleSimulation::tick automatically:
impl ExampleSimulation {

    #[host_call]
    fn tick(mut self, input: SimulationInput) {
        .time += 1
        .accepted_position = input.requested_absolute_position
        if input.fired {
            .fire_count += 1
        }
    }
}
The simulation increments self.fire_count when the fire button, here the left mouse button, is pressed, and stores the accepted absolute position.
Now for the slightly more advanced part: rendering. The simulation struct is passed in automatically, so the renderer can use the current position and fire_count.
The wgpu shaders and pipeline can be tricky at first, but the basic pieces are:
-
uniform buffer: think of it as global values for the shader.
-
vertex (instance) buffer: the format of your per-instance data. We render debug quads in different colors, so each instance contains:
struct DebugQuadInstance {
    pos: Vec2f
    size: Vec2f
    color: Vec4f
}
After those buffers are created, the renderer writes to them and creates a render pass. You need a new render pass whenever the target color attachments change. In this example we render only to the screen, so one render pass is enough.
// Render pass
mut render_pass: wgpu::RenderPass
// No depth attachment is needed here
render_pass.depth_attachment = -1

// Render debug quads

// The pipeline defines the shader, vertex buffer, and uniform formats.
render_pass.set_pipeline(.debug_quad_pipeline)

// The bind group contains the predefined values used by that pipeline.
render_pass.set_bind_group( group_index: 0, bind_group: .debug_quad_bind_group )

// Set the instance buffer.
render_pass.set_vertex_buffer( slot: 0, vertex_buffer: .debug_quad_instance_buffer)

// Draw the shared quad geometry and then the instance range.
render_pass.draw( [0, 6], [0, 1] )

// Hand the render pass to Lily2D for presentation
wgpu::add_pass(render_pass, 'render stuff to screen')
Compiling / Running
If you use the VSCodium or VS Code extension, you should already get syntax feedback and automatic compilation on save. If you use another editor, build the project in Lily Hub:
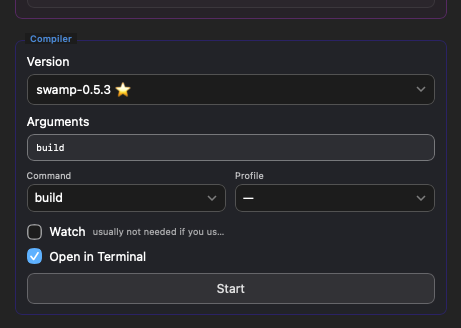
Press Start to build the project. Open in Terminal can be useful since it lists warnings and errors.
To build using the lily CLI:
lily build
To run it, press Start in the Engine section:
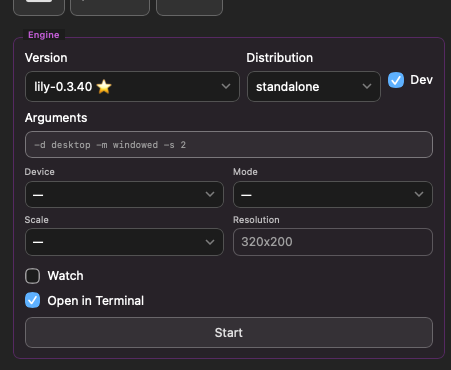
To run using the lily CLI:
lily run
Export
To export your game to itch.io or Steam, press the export button. Steam export requires a Steam partner account, and itch.io export requires an itch.io page.
VSCodium extension
Go into settings
First make sure the correct Swamp version is installed globally on your machine:
Then press “Install Extension” to install it into VSCodium.

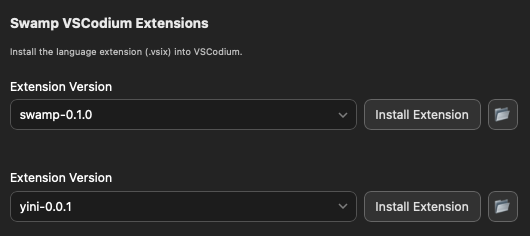
Other VS Code-compatible editors
If you are using another VS Code-compatible editor, click the folder button to find the .vsix file.
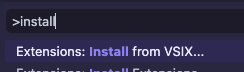
In your VS Code-compatible editor select:
“Install from VSIX…”
What’s next
- Join our community on Discord
- Lily2D API Documentation. Lists all modules and functions.
- Swamp. The specification. Goes through all different keywords.
- Swamp Core. Built in functionality in Swamp.
- Swamp Idioms. Very detailed, but will get you a feel for the Swamp language.
Community packages
| Name | Author | Description |
|---|---|---|
| gfx | @piot | Sprites API. |
| tektite | @catnipped | A customisable package for rendering Quads, Sprites and Text in Lily2D. |
Add the package to your project in swamp.yini.
If it is approved in the swamp registry:
dependencies: {
  tektite: "0.1.2"
}
If the package is not in the swamp registry, you use the format:
dependencies: {
  tektite: { repo: "codeberg:catnipped/tektite", version: "0.1.2" }
}
Read the Swamp Package page for more info.